
Stable Diffusion Beginner’s tutorial – How to make AI images


Step 3: Click on New Image
Click on the pink icon to start a new image. The design may change from time to time as we release new features, but it’s always pink.
You will now arrive at the “studio” screen. Don’t be intimidated by all of the knobs and levers, they’ll become second nature to you soon.

Step 4: Click on the “positive prompt” box
A positive prompt are words that we want the A.I. to create. The order of the words is most important. We’ll get to best practices at the end of the lesson — in the meantime, just copy this:
a beautiful gray chubby cat in a garden, soft background, eyes looking at the viewer, sunset, golden hour
Step 5: Click the render button
The “render” button creates the image.
It is gray at first — until we write what we want to create. It should now be lit up in purple, ready to go. Click render and wait a few seconds. And you’re done! It’s that easy. Congratulations, you’re now an AI creator.
After it’s done, try changing up the prompt a little bit and compare the difference. Don’t worry about losing your images — When images are completed, they are automatically saved to My Images.

As images are rendering, you can start editing your prompt to work on the next iteration. As our service is unlimited, don’t be afraid to make mistakes.
Jargon Watch: Concepts?
You may have noticed the “concept models” area in your editor is set to CyberReal11-XL. This is what’s called a base model, full model, or checkpoint. It determines the overall art style of the image. In the image below, we chose CanvasDark-XL, an anime style model. The prompt didn’t change!

There are many art styles like comics and illustrations, too. Try them all! Just remember that model “families” exist – don’t mix XL with non-XL.
We have thousands of art styles you can choose from! Tutorial
Keep going: Try a negative prompt
Now let’s get fancier and improve on it. Add “negative” terms to guide the AI towards a higher quality result. We’ll explain how all this works soon, let’s just try one to compare first.
Copy this in the “negative” prompt field and click Render.
[[low resolution, worst quality, blurry, plain background, white background, simple background, normal quality, bad quality]]

Quick review of what we just did:
- Positive words can be made more powerful when nested in round brackets (like this). Each pair of nested round brackets adds 1.1x emphasis
- Negative words work in the same way but are nested in square brackets [like this]. Nesting more subtracts 1.1x emphasis per keyword.
Positives and Negative examples
Positive prompts and Negative prompts are words that tell the AI about what we do and don’t want to see. Humans don’t typically communicate this way, so it may seem a little unusual at first, but in a very noisy environment we might say “not that, but this!” and that’s essentially what we are doing.
- ((give me what I want)) [[but, not, these, things]]
- ((pretty cat)) [[ugly cat]]
- I want a (cat) but not a [dog]
This prompting style gives you both power and precision.
Another example:
Imagine trying to order a chocolate donut in a very noisy, shouty cafeteria. Talking to an AI is a little like this. You can ask for a chocolate donut, so it’s so much clearer if you say that you want a ((chocolate donut)) [[strawberry, vanilla, almond]]. It really drives the point home.
While it may seem redundant, you can also say ((give me good pictures)) [[but not bad pictures]] every time. There are better ways to express this than typing out such things every time, which we’ll get to in the Embeddings tutorial.
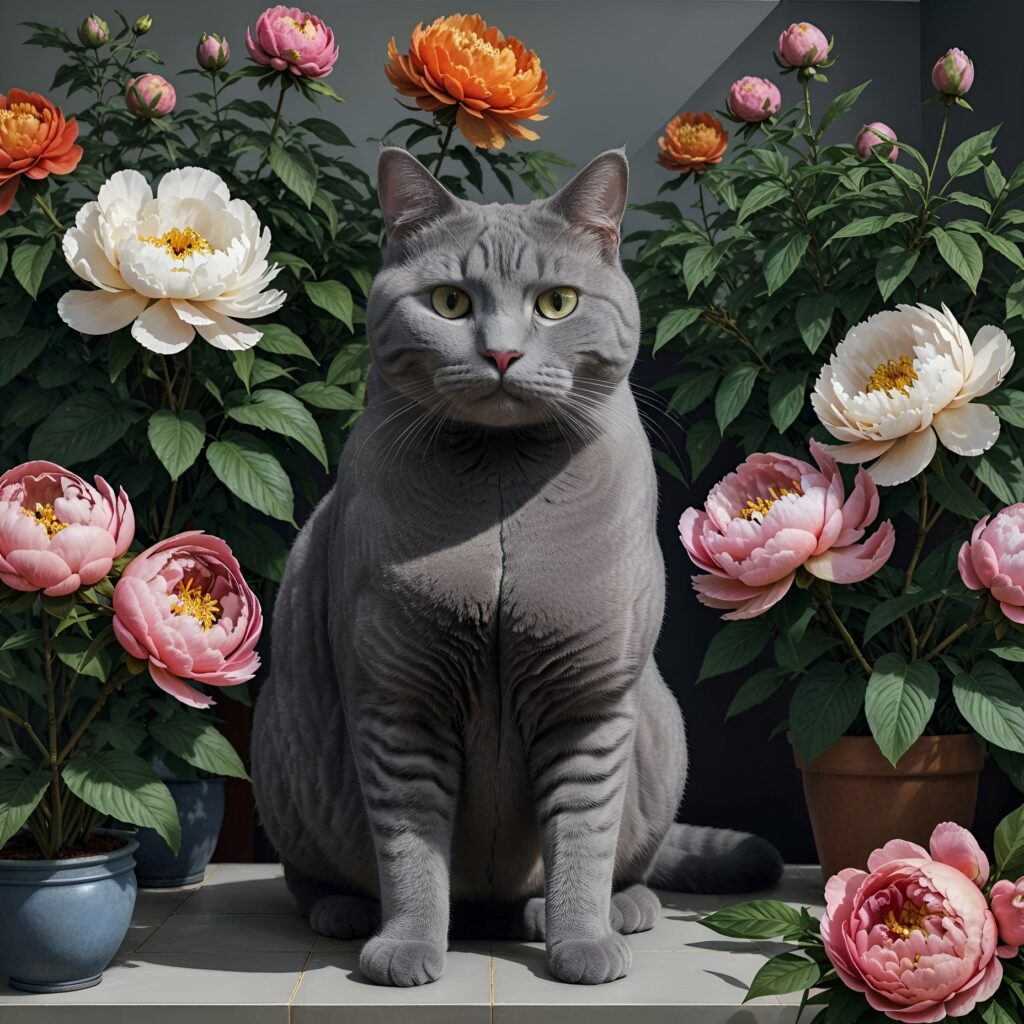
Creating a fancier fat cat
The more descriptive you are, the better your results can be. Try this prompt created by community member “Tomato”
Positive Prompt
#sdxlreal ((best quality, highres, masterpiece, vibrant)) by Julio Larraz, big garden, beautiful gray chubby cat, British short hair, plants, peonies, liminal, patterns, big room, free space, intricate nature, additional details, realistic cat (8K UHD, hyper realistic,highly detailed,intricate detail,perfect lighting,award-winning photo,dynamic,detailed background,vibrant colours,background details,reflections,ultrasharp focus,crisp edges,perfect image)
Negative Prompt
[[low resolution, worst quality, blurry, plain background, white background, simple background, normal quality,bad quality]]
What’s different?
- Tomato added more words associated with beauty, and emphasized words like “best quality, highres, masterpiece, vibrant” by a factor of 2x. They also put a little emphasis on other words, and took away emphasis on images that may be associated with “low resolution” by putting bad quality words in the negative field.
- Did you catch the hashtag? #sdxlreal is what’s called recipe, and we have hundreds of recipes in the system. A recipe is a prompt template to speed up repetitive typing.
- Recipes are time savers. You don’t have to write long positive and negative reinforcement every time. Instead, you can program your own recipes to program all of your favorite words and models and settings.
- You can boost quality by increasing the resolution and steps. Try an image size near 1024×1024 image at 50 steps. It should result in a more pleasing image, though it may take some extra time.
- If you know PirateDiffusion commands, enter them in the Other options
Summary
We’ve covered the basics of “text-to-image” – one of the easiest ways to create images. For your next lesson, why not try this on PollyGPT that writes long detailed prompts for you?
Glossary of Terms
AI model – Also called concepts, an AI model is a new paradigm in computing. Think about it as not quite a database nor a collection of pictures, but a file that contains learned patterns. For example, a model could be trained to learn what oil paintings, horses, or astronauts look like in general and then produce them in various situations. Stable Diffusion is a popular model.
Prompt – The instructions sent to the AI are called prompts. The above is an example of a Stable Diffusion prompt, with some formatting short-hand codes unique to our apps. Each word that an AI recognizes is called a Token
( ) – Round brackets make words Positive. It means that something is important, they create emphasis. Every nested pair of ( ) increase the factor by 1.1x.
[ ] – Square brackets de-emphasize an idea. Adding [[low quality, worst quality]] results in a higher quality picture. Each pair reduce the factor by 1.1x.
Be diligent about counting and closing your positive and negatives, and never mix the two inside each other.
# – Hashtags invoke recipes, which are community-created art style macros. In this lesson, we tried #sdxl and #sdxlreal. Also try #boost and #everythingbad, some of our favorites. You will learn how to create your own recipes in a future lesson.
Prompting tips:
- Word order matters. A good general structure for prompts is “((1-3 tokens that boost quality)) A subject that looks like this, doing this action, some other characteristics, at this place [[then your negatives go last]]”. However, some people prefer to load negatives first. There’s no hard rule, but we find that this framework can be most helpful for beginners, as it’s easy to remember and is effective.
- Guidance can fix noise issues. If you get artifacts, try adjusting the guidance and simplifying your positive and negative prompts.
- Don’t overdo your positives and negatives. Overdoing the emphasis like (((nice smile))) and [[[teeth]]] can glitch the photo if it can be interpreted as conflicting information. It’s never good to get into a shouting match with your prompt, instead try reordering what’s most important first. If blue squares appear, think about this. You’ll learn about a parameter called Guidance (aka CFG) in a future lesson that can also help you mitigate this.
- Only using one recipe works best – It is possible to load multiple recipes, but glitches and conflicts may occur.